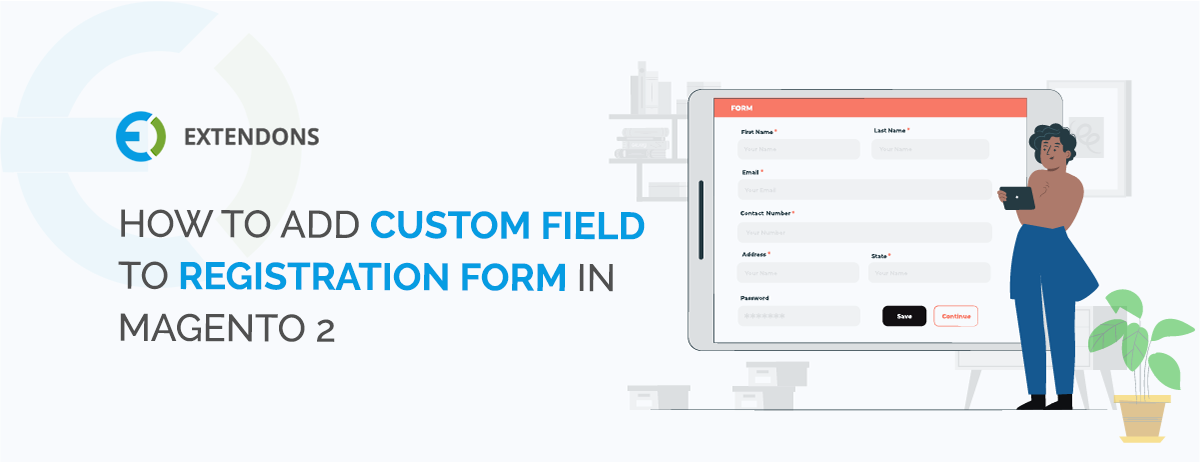
Since the default Magento user registration form comes with predefined fields, for many merchants it does not fulfill the different requirements of their online stores. In this article, we will show you how to add custom fields to Magento 2 registration form using the Custom Registration Fields extension.
You can collect any type of information from customers using 13 different types of fields. With extra information, you can know your clients better from the moment of registration. You can analyze customer data and use it to deliver a more consistent shopping experience and improve your products and marketing strategies.
Add Custom Field to Registration Form in Magento 2
In order to add new custom fields to the user registration form, follow these steps:
First of all, download & install Magento 2 Custom Registration Form Fields extension by FME.
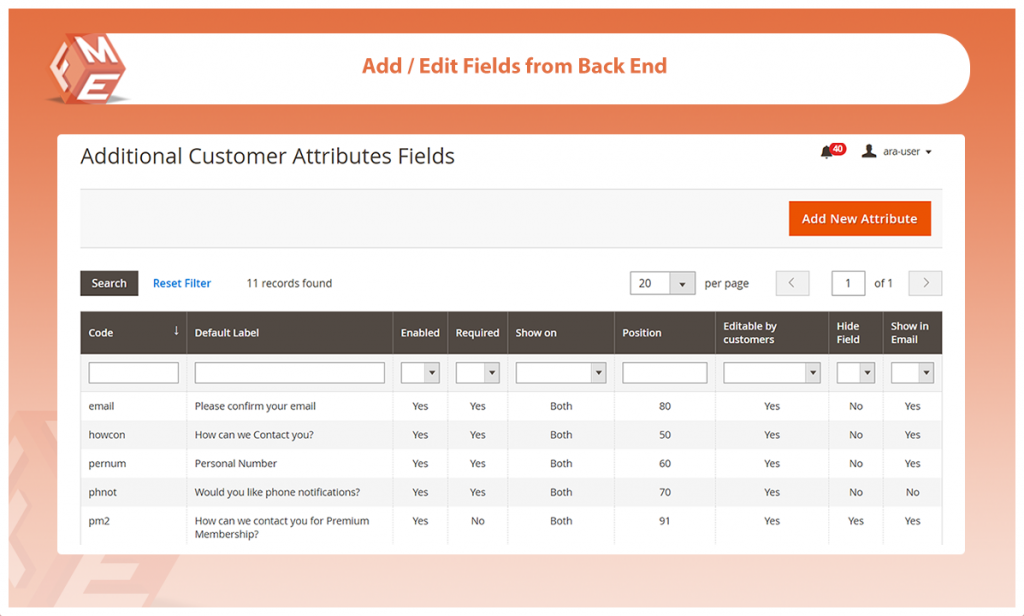
Now, Login to Admin Panel and navigate to FME Extensions> Click Additional Custom Registration Fields
Click on Add New Attribute
In Properties Tab, fill all the required information.
Default Label – Set the Field Label
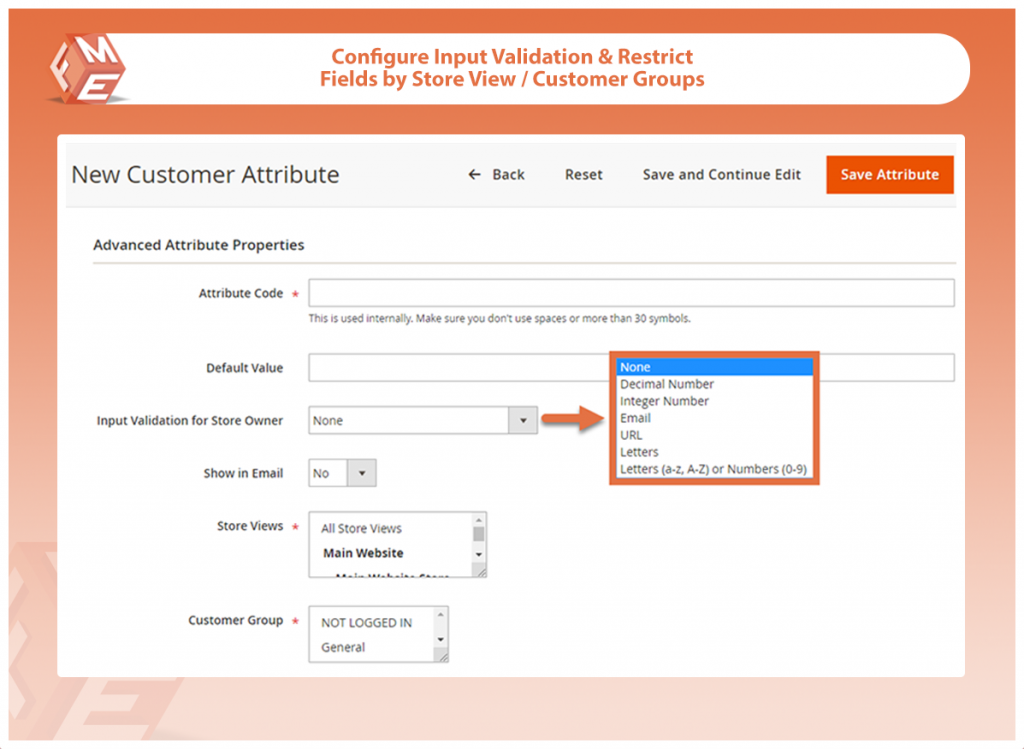
Catalog Input Type for Store Owner – Select Custom Field Type
Select from 13 available custom field types to add to your registration form
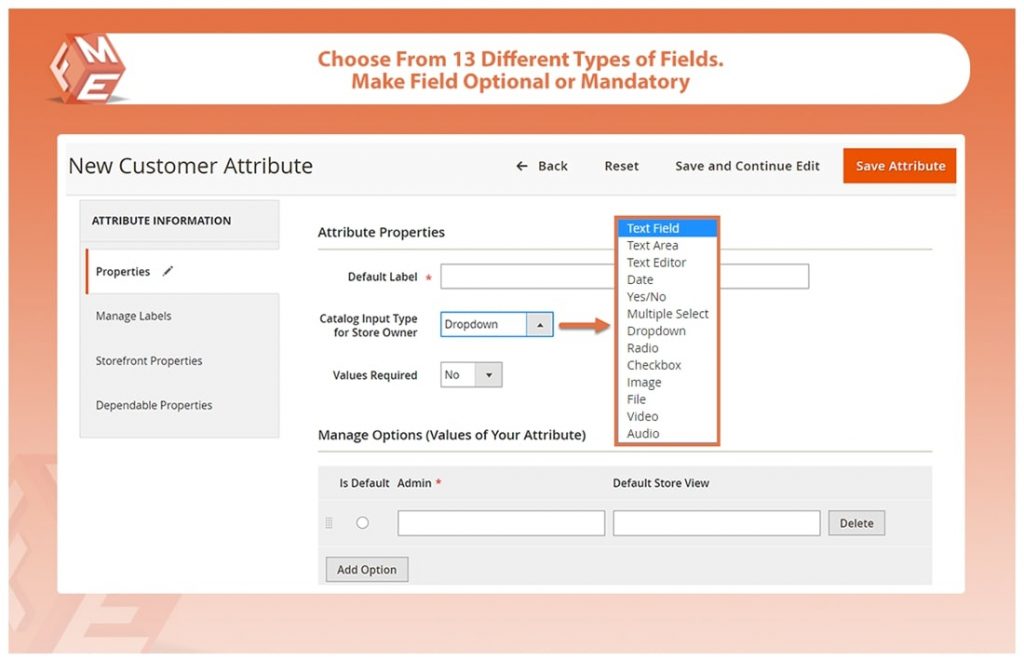
Values Required – Make Field optional or mandatory
Attribute Code – Add a unique attribute code
Default Value–You have the option to set a default value for each custom field.
Input Validations – To collect data in the correct format, you can set custom fields input validation types like email, URL, etc.
Show in Email – Show custom fields data in invoice emails
Store Views – Restrict custom fields to specific store views
Customer Groups – Restrict certain custom fields to specific customer groups like wholesalers, traders, etc.
Now Open the Manage Labels Tab
You can set different labels for different store views
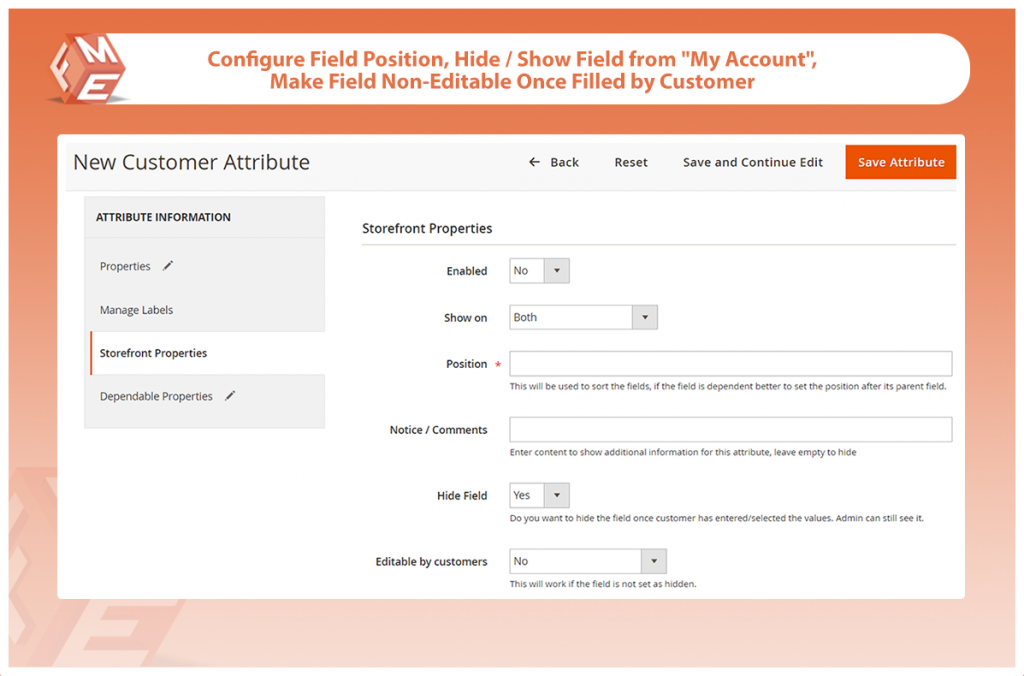
Now Click StoreFront Properties Tab,
Enabled – Enable/Disable the custom field
Shown On – Display the custom field on the registration form, user account section, or show it in both
Position – Set the position of the field in the registration form
Notice/Comments – Enter additional information for the custom field
Hide Field – You can hide a specific custom registration field, once the customer has entered/selected the values.
Editable by Customers – Allow customers to edit the entered data
Now Click Dependable Properties Tab:
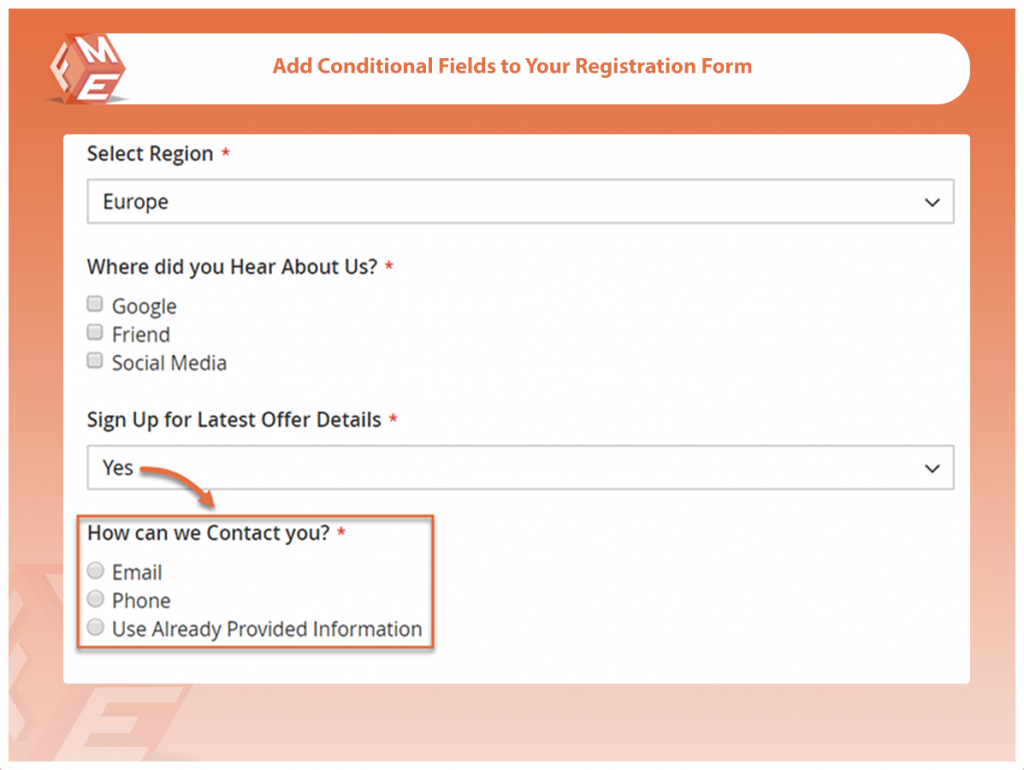
This extension also enables you to create dependable fields. For this, you need to display the dependable fields in the proper hierarchy and display the dependable field next to the parent field in order to avoid any visual issues.
You can choose any of the following custom registration fields that will be a parent:

Save & Publish
The field shall be visible on frontend.
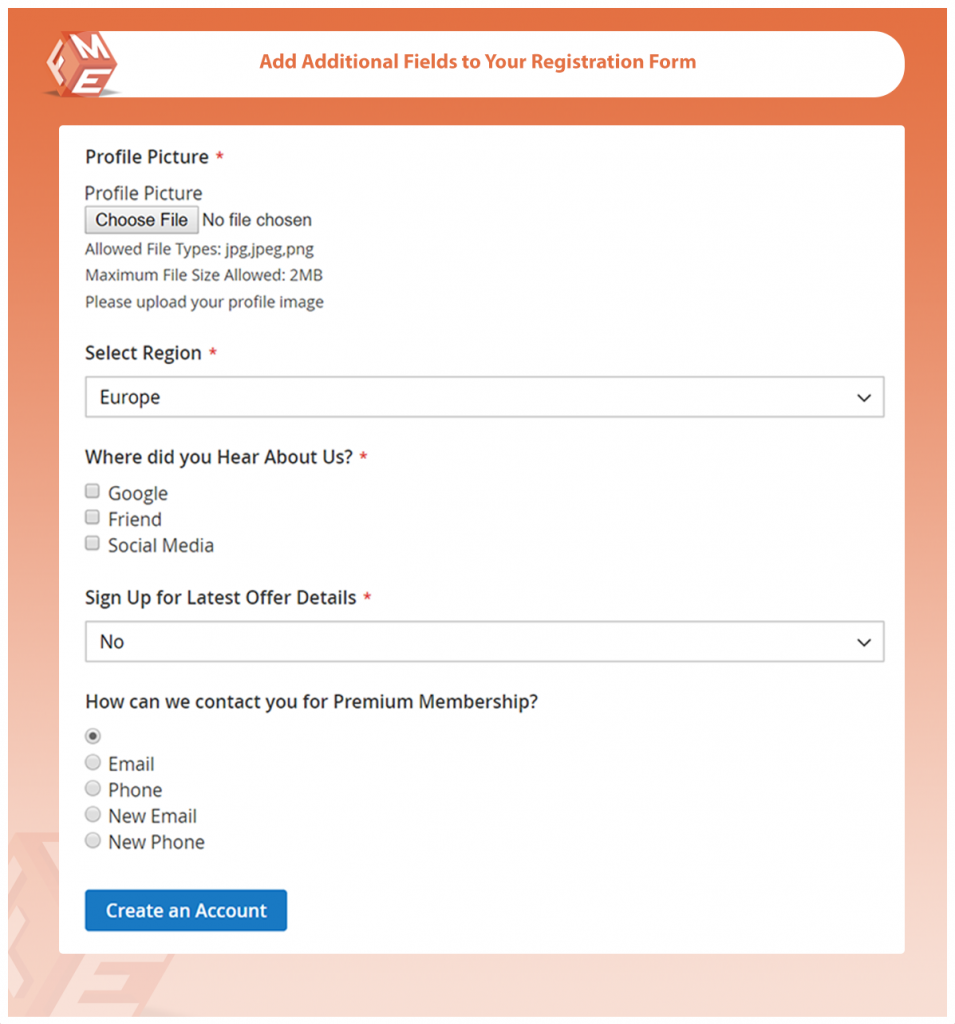
Additional Custom Fields on Registration Form:
Conditional Fields on User Registration Form:
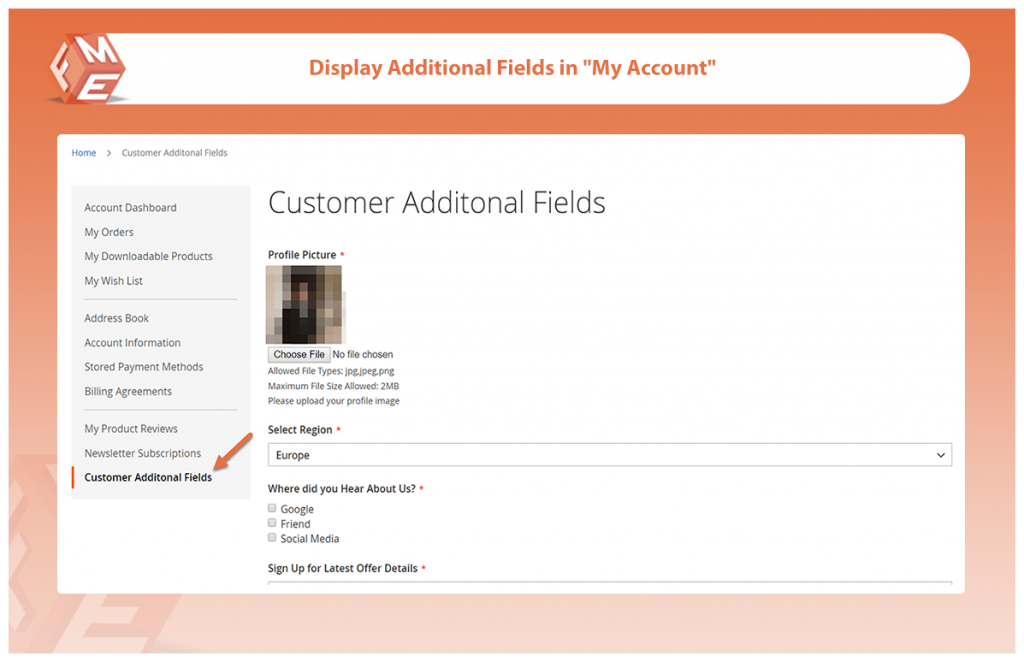
Additional Fields in Customer Account Section: